Over eighty percent of British tenants report disputes over end of tenancy cleaning every year. The pressure to leave a property spotless can be intense, especially when the return of your deposit depends on meeting exacting standards. Knowing exactly where to start and what to prioritise gives you a vital edge. This guide highlights practical steps trusted by British renters to ensure your move out process is smooth, thorough, and stress free.
Table of Contents
- 1. Conduct A Detailed Inspection Before You Start
- 2. Use A Checklist For Every Room In The Property
- 3. Focus On High-Traffic And Hidden Areas
- 4. Choose The Right Cleaning Products And Equipment
- 5. Pay Attention To Appliances And Fixtures
- 6. Tackle Carpets, Floors And Upholstery Properly
- 7. Finish With A Final Quality Check And Documentation
Quick Summary
| Key Insight | Explanation |
|---|---|
| 1. Conduct a thorough inspection first | Assess the property systematically, documenting areas needing attention to create a cleaning roadmap and avoid disputes. |
| 2. Use a room-by-room checklist | A structured checklist ensures you cover all critical areas, reducing stress and tracking cleaning progress effectively. |
| 3. Focus on high-traffic and hidden areas | Pay special attention to neglected zones that accumulate dirt, improving overall cleanliness and reducing allergens. |
| 4. Select appropriate cleaning products | Match cleaning solutions to surfaces for effective cleaning without damaging materials; this enhances cleaning outcomes. |
| 5. Document your final clean thoroughly | Dated photographs and records of cleaning activities provide evidence of the property’s condition to protect your deposit. |
1. Conduct a Detailed Inspection Before You Start
A comprehensive inspection is your first line of defence in ensuring a smooth and successful tenancy clean up. Before diving into scrubbing and wiping, you need to assess the entire property with a critical eye, documenting every nook and cranny that requires attention.
Start by walking through each room systematically, noting areas that demand special focus. Jesus College’s comprehensive room cleaning checklist recommends a methodical approach that helps tenants identify potential problem zones. Pay close attention to high traffic areas such as floors, windows, and surfaces that accumulate dust and grime.
Grab a clipboard or your smartphone and create a room-by-room inventory. Look for:
- Wall marks and scuffs: Identify areas needing touch-ups or deeper cleaning
- Carpet and flooring conditions: Note any stains, wear patterns, or damage
- Kitchen and bathroom fixtures: Check for limescale, soap scum, or hidden grime
- Window and door frames: Inspect for dust buildup and potential mould growth
- Overlooked spaces: Behind furniture, inside cupboards, and corners often missed during regular cleaning
Documenting these details serves two critical purposes. First, it provides a clear roadmap for your cleaning strategy. Second, it protects you from potential disputes by creating a transparent record of the property’s condition before your final clean. By investing time in a thorough initial inspection, you set yourself up for a more efficient and successful tenancy clean-out.
2. Use a Checklist for Every Room in the Property
Successful end of tenancy cleaning requires strategic planning and meticulous organisation. A room-by-room checklist transforms an overwhelming task into a manageable and systematic process, ensuring no corner is left unchecked.
Jesus College’s comprehensive cleaning checklist highlights the importance of a structured approach when preparing a property for move out. By creating a detailed checklist, you establish a clear roadmap that minimises stress and maximises efficiency.
Key Reasons to Use a Room-by-Room Checklist:
- Prevents overlooking critical cleaning areas
- Creates a structured cleaning workflow
- Helps track progress systematically
- Reduces potential disputes with property managers
- Provides a sense of accomplishment as tasks are completed
Essential Checklist Components for Each Room:
- Living Areas: Dust surfaces, clean windows, vacuum carpets, wipe skirting boards
- Kitchen: Deep clean appliances, sanitise worktops, clean inside cupboards, degrease surfaces
- Bathroom: Scrub tiles, clean toilet, descale taps, wash shower/bath thoroughly
- Bedrooms: Dust furniture, clean mirrors, vacuum floors, wipe down wardrobes
Remember that a comprehensive checklist transforms cleaning from a daunting task into a methodical and achievable process. By breaking down the work into specific room requirements, you ensure a thorough and professional result that meets the highest property standards.
3. Focus on High-Traffic and Hidden Areas
Property cleaning success lies in understanding that visible surfaces tell only half the story. High-traffic zones and hidden areas accumulate dirt and grime that can quickly transform a seemingly clean space into a maintenance nightmare.
Jesus College’s comprehensive cleaning checklist emphasises the critical importance of addressing overlooked spaces that often escape routine cleaning. These areas become magnets for dust, allergens, and potential property damage if neglected.
High-Traffic Areas to Prioritise:
- Hallway floors and skirting boards
- Door handles and light switches
- Kitchen worktops and appliance handles
- Bathroom tiles and toilet bases
- Window sills and frames
Hidden Zones Requiring Thorough Attention:
- Behind and underneath furniture
- Inside kitchen cupboards and drawers
- Behind large appliances like refrigerators and washing machines
- Corners of rooms and ceiling edges
- Air vents and radiator surfaces
Practical Cleaning Strategies:
- Move furniture to access hidden surfaces
- Use extendable cleaning tools for hard to reach areas
- Employ microfibre cloths for dust and grime removal
- Sanitise high touch points with appropriate cleaning solutions
Addressing these often forgotten spaces ensures a comprehensive clean that goes beyond superficial tidying. Your diligence in these areas will significantly improve the overall presentation and hygiene of the property.
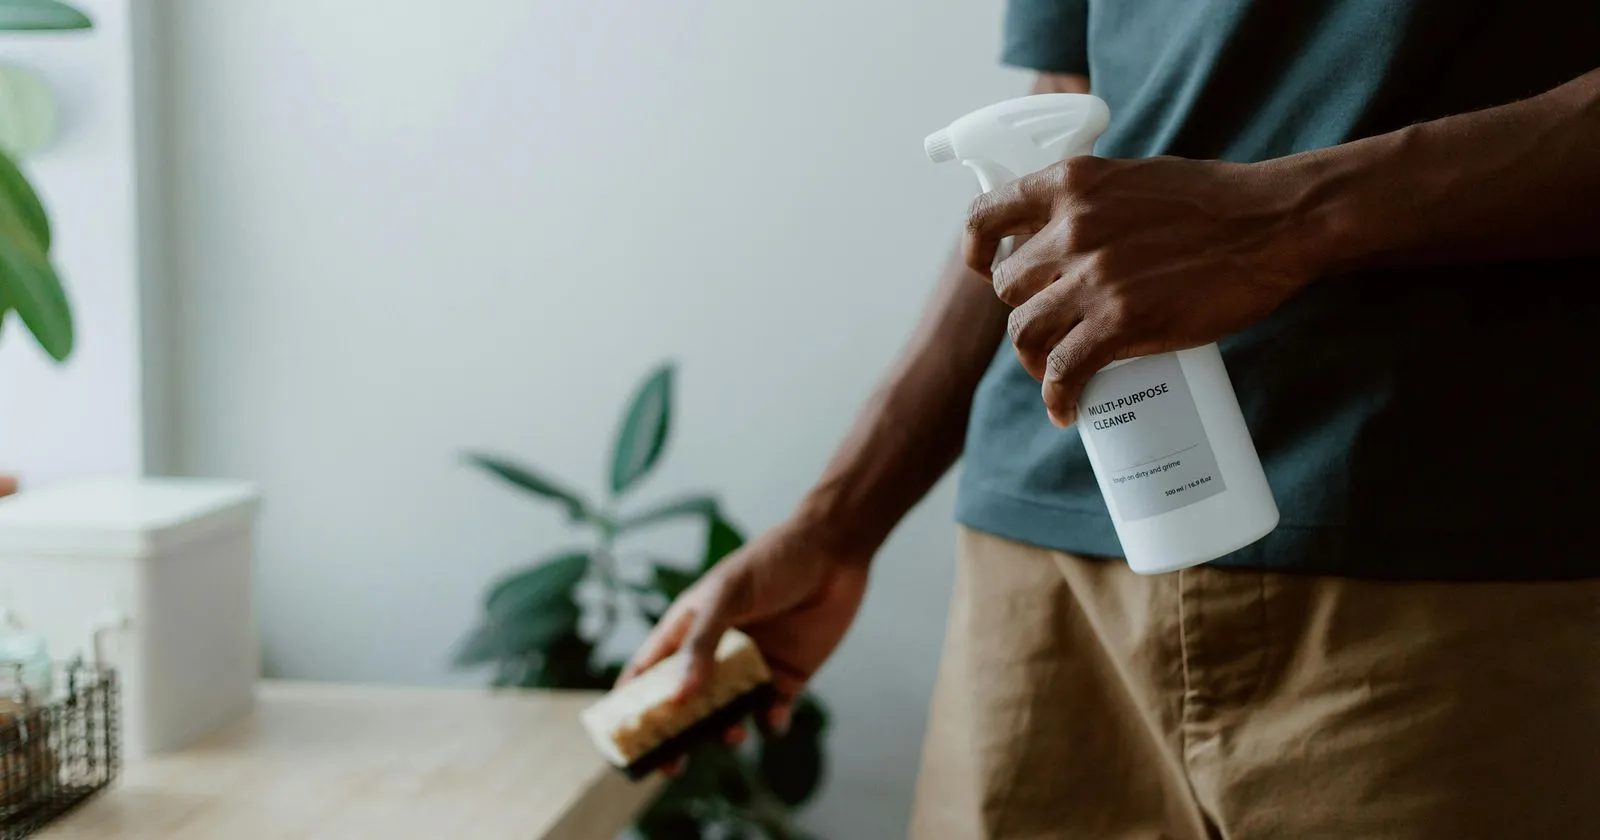
4. Choose the Right Cleaning Products and Equipment
The secret to a successful property clean lies not just in effort, but in selecting the most appropriate tools and cleaning solutions. Different surfaces and materials demand specific approaches to ensure thorough cleaning without causing inadvertent damage.
Jesus College’s cleaning checklist underscores the importance of matching cleaning equipment to specific cleaning tasks, highlighting how strategic product selection can dramatically improve cleaning outcomes.
Essential Cleaning Equipment Toolkit:
- Microfibre cloths for dust and delicate surfaces
- Extendable mop for hard to reach areas
- Powerful vacuum cleaner with multiple attachments
- Scrub brushes with varying bristle strengths
- Telescopic cleaning tools for high surfaces
Cleaning Product Selection Criteria:
- Surface compatibility
- Environmental considerations
- Effectiveness against specific stains
- Non-toxic formulations
- Cost efficiency
Strategic Cleaning Product Recommendations:
- Multi surface cleaners for versatility
- Specialised solutions for wood, glass, and tiles
- Eco friendly alternatives to harsh chemicals
- Concentrated products for better value
- Neutral pH cleaners to protect surfaces
Remember that intelligent product selection goes beyond simple cleaning. The right tools protect your property, preserve surfaces, and demonstrate professional care during the end of tenancy process.
5. Pay Attention to Appliances and Fixtures
Appliances and fixtures are often the most scrutinised elements during a property inspection, representing both functional and aesthetic standards of cleanliness. A thorough cleaning approach requires meticulous attention to these critical components.
Jesus College’s comprehensive cleaning checklist emphasises the importance of addressing every appliance and fixture to ensure they appear well maintained and operationally sound.
Key Appliances Requiring Detailed Cleaning:
- Refrigerator (interior and exterior)
- Oven and stovetop
- Washing machine and dryer
- Dishwasher
- Microwave
Fixture Cleaning Priorities:
- Light fittings and lampshades
- Electrical switches and plug sockets
- Extractor fans
- Shower heads and taps
- Radiators and heating units
Strategic Cleaning Approaches:
- Remove internal shelves and wash separately
- Use specialised cleaning solutions for metal surfaces
- Descale kettle and coffee machines
- Clean behind and underneath movable appliances
- Polish chrome and stainless steel fixtures
Paying careful attention to appliances and fixtures demonstrates respect for the property and increases the likelihood of recovering your full tenancy deposit. A pristine presentation speaks volumes about your overall maintenance approach.
6. Tackle Carpets, Floors and Upholstery Properly
Carpets, floors, and upholstery represent the most visible and vulnerable surfaces in any property, requiring a strategic and comprehensive cleaning approach. These areas accumulate significant dirt, stains, and wear that can dramatically impact the overall impression of a space.
Jesus College’s comprehensive cleaning checklist highlights the critical importance of methodical cleaning techniques for different surface types, ensuring thorough restoration and maintenance.
Carpet Cleaning Strategies:
- Vacuum thoroughly in multiple directions
- Use carpet cleaning solution for deep stains
- Address high traffic areas with extra attention
- Consider professional steam cleaning for significant restoration
- Remove embedded dirt using specialised attachments
Floor Cleaning Approach:
- Match cleaning method to floor material
- Use appropriate mops and cleaning solutions
- Clean along wood grain for wooden surfaces
- Use microfibre cloths for delicate flooring
- Avoid excessive water on wooden or laminate floors
Upholstery Maintenance:
- Vacuum fabric surfaces thoroughly
- Treat stains immediately with appropriate solutions
- Use fabric specific cleaning techniques
- Consider professional upholstery cleaning for complex fabrics
- Test cleaning solutions on inconspicuous areas first
Taking time to clean these surfaces meticulously demonstrates respect for the property and increases the likelihood of recovering your full tenancy deposit. Systematic and careful cleaning transforms these areas from worn to wonderfully restored.
7. Finish with a Final Quality Check and Documentation
The final stage of end of tenancy cleaning is arguably the most critical moment that determines the success of your entire cleaning effort. A meticulous quality check and comprehensive documentation can be the difference between recovering your full deposit and facing unexpected deductions.
Jesus College’s comprehensive cleaning checklist emphasises the importance of a systematic final review to ensure every cleaning task meets professional standards.
Final Quality Check Components:
- Verify all rooms thoroughly cleaned
- Check hard to reach areas and hidden surfaces
- Compare current state with initial property inventory
- Ensure no cleaning residue remains on surfaces
- Test all electrical fixtures and appliances
Documentation Best Practices:
- Take clear dated photographs of cleaned areas
- Create a written record of cleaning activities
- Note any pre existing damages for reference
- Collect cleaning product receipts
- Retain copies of cleaning checklists
Strategic Documentation Techniques:
- Use natural light when photographing rooms
- Capture wide angle and close up images
- Include time and date stamps on photographs
- Use neutral language when describing property condition
- Keep digital and physical copies of all records
Thorough documentation protects your interests and provides transparent evidence of your responsible tenancy. A comprehensive final check transforms a standard clean into an exceptional property presentation.
Below is a comprehensive table summarising the key strategies for successful end of tenancy cleaning as discussed throughout the article.
| Aspect | Details | Benefits/Outcomes |
|---|---|---|
| Inspection | Conduct a detailed walkthrough, noting issues. | Provides a clear roadmap and protects against disputes. |
| Use a Checklist | Apply a structured room-by-room approach. | Minimises stress and ensures thoroughness. |
| High-Traffic & Hidden Areas | Focus on commonly used and neglected spaces. | Ensures comprehensive cleaning and property hygiene. |
| Cleaning Products | Select appropriate tools and solutions per surface. | Protects property while enhancing cleaning outcomes. |
| Appliances & Fixtures | Clean both aesthetics and functionality. | Enhances appearance and functionality, ensuring full deposit return. |
| Carpets & Upholstery | Use methodical cleaning techniques for visible surfaces. | Restores and maintains property presentation. |
| Final Check & Documentation | Conduct a quality inspection with photographs. | Protects interests and provides evidence of a responsible tenancy. |
Ensure a Spotless Move-Out with Expert After Tenancy Cleaning
Navigating the challenges of after tenancy cleaning can be overwhelming, especially when high-traffic and hidden areas demand meticulous attention. This article highlights key goals such as conducting thorough inspections, using detailed checklists, and selecting the right products to protect your property and secure your tenancy deposit. If you want to eliminate stress and achieve professional results, tailored cleaning solutions are essential.
Trust HARC Solutions for comprehensive post-tenancy cleaning that covers every detail from carpets to appliances. Our trained and insured team specialises in meticulous after tenancy and pre-tenancy cleaning designed to meet landlords’ and estate agents’ exacting standards. We understand that a flawless finish and transparent documentation are critical to your success.
Ready to transform your property cleaning experience? Visit HARC Solutions now and explore our dedicated after tenancy cleaning services crafted to address your specific needs. Let us handle the hard work so you can focus on what matters most. Book your service today and protect your deposit with confidence.
Frequently Asked Questions
What are the first steps I should take for end of tenancy cleaning?
Start with a detailed inspection of the property to identify areas needing special attention. Document high-traffic zones, hidden areas, and any specific damage before beginning the cleaning process.
How can I ensure I don’t miss any cleaning tasks?
Using a room-by-room checklist is key to staying organised during the cleaning. Break down tasks for each space, ensuring that you cover essential components like kitchens, bathrooms, and living areas systematically.
What cleaning products are best for end of tenancy cleaning?
Choose cleaning products based on surface compatibility and effectiveness against specific stains. Focus on using non-toxic, multi-surface cleaners to protect the property’s surfaces while achieving thorough cleanliness.
How should I clean carpets, floors, and upholstery effectively?
For carpets, vacuum in multiple directions and consider using specialised cleaning solutions for tough stains. Ensure floors are cleaned according to their material, and maintain upholstery by vacuuming and treating stains immediately.
Why is it important to document the cleaning process?
Documenting your cleaning efforts provides evidence of the property’s condition, helping to protect your deposit. Take dated photographs and create a written record of tasks performed to ensure transparency and accountability.
What should I include in my final quality check before leaving the property?
Conduct a thorough review to verify all cleaning tasks are completed, inspecting hard-to-reach areas. Ensure that all surfaces are free from residue and test all appliances and fixtures to confirm they are operational.